티스토리 뷰
DynamoDB

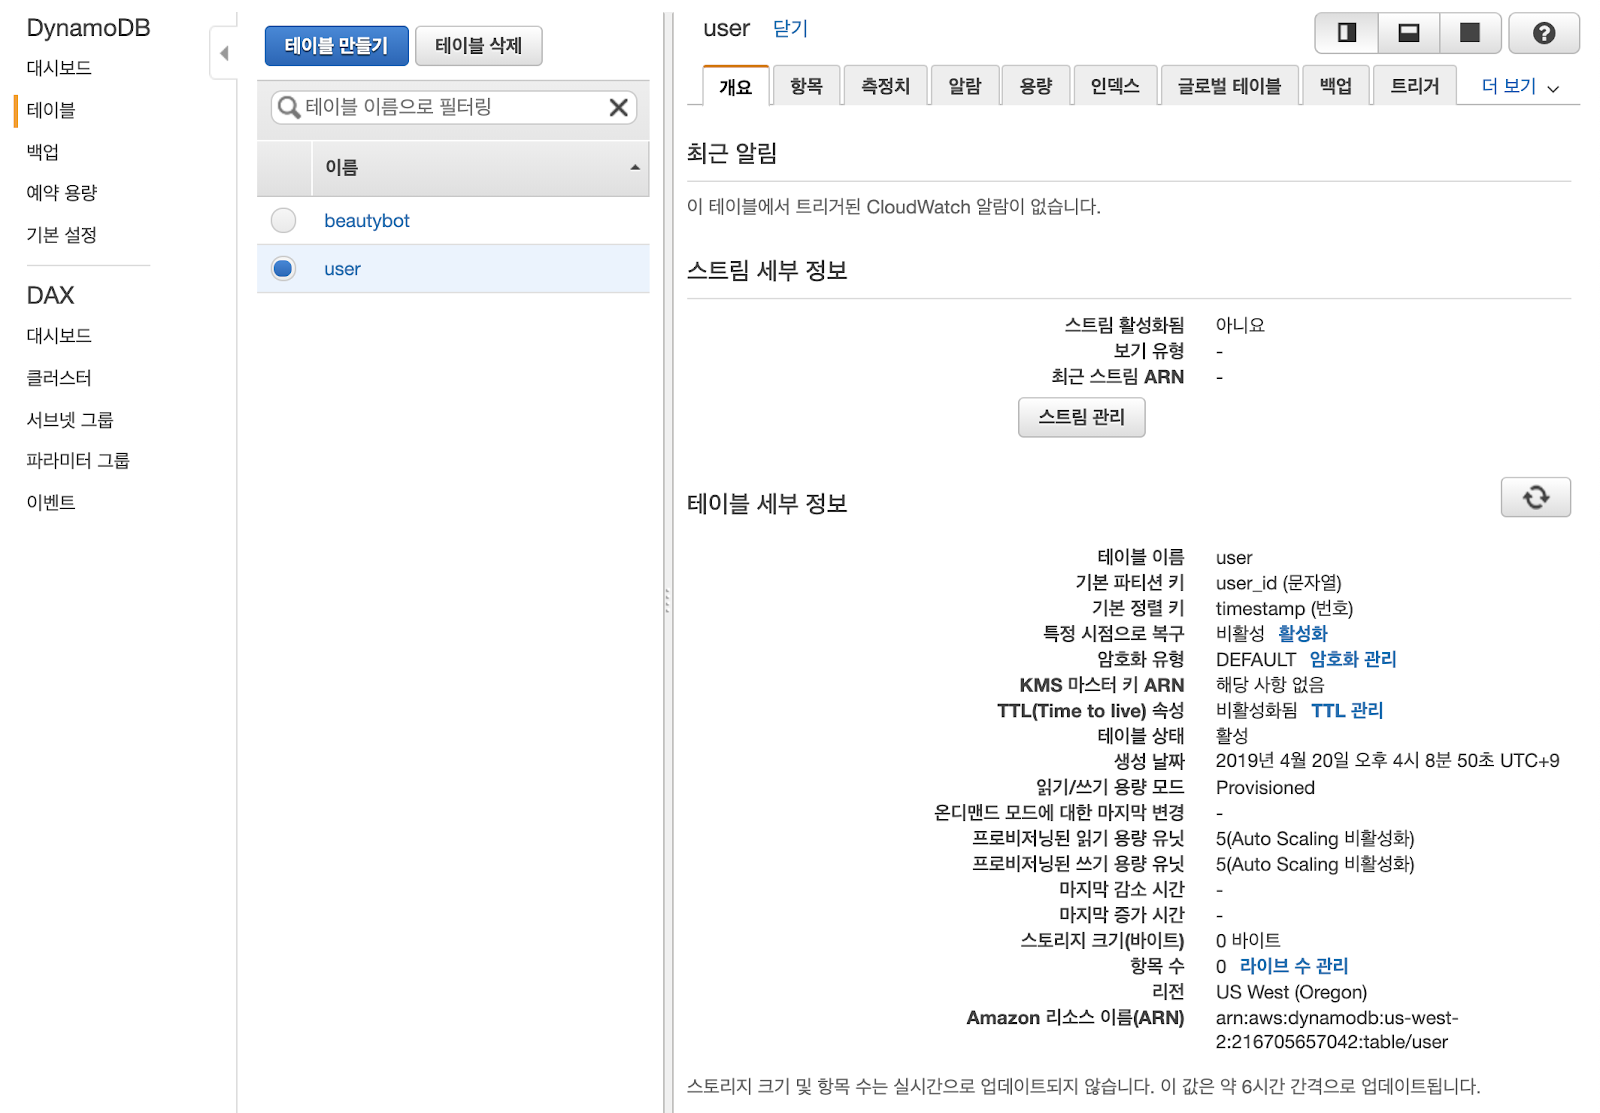
DynamoDB에 테이블을 구축해야 합니다. 테이블을 만들어봅시다.

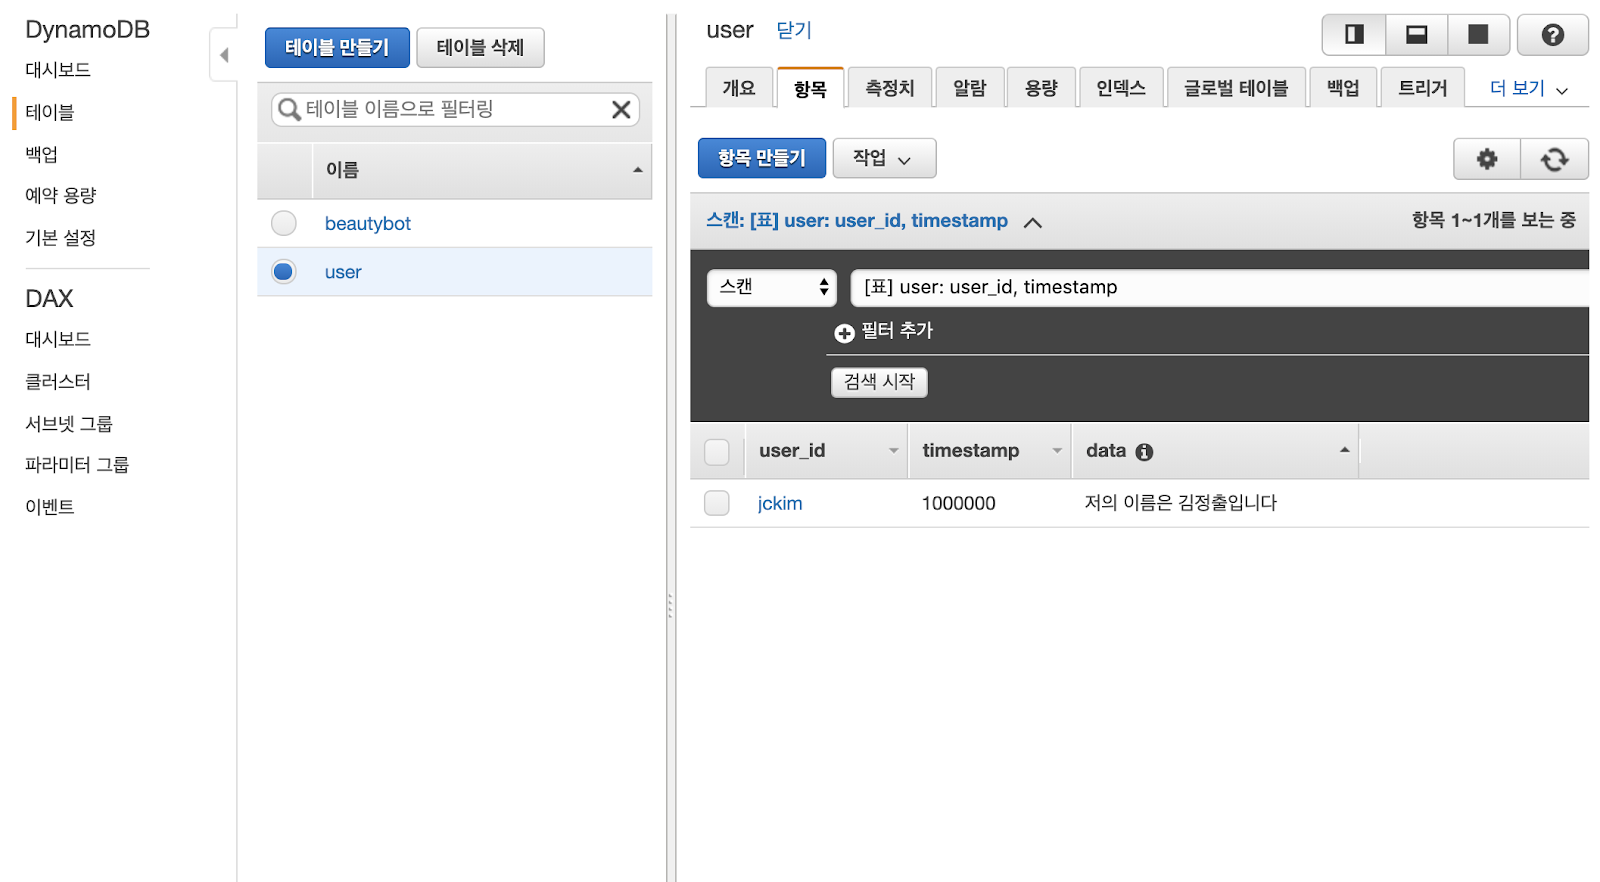
user라는 이름의 테이블을 생성하고 기본 키에서 파티션 키를 user_id로 String으로 설정하고, 정렬 키를 timestamp의 Number로 설정합니다. 이후에 생성 버튼을 클릭합니다.
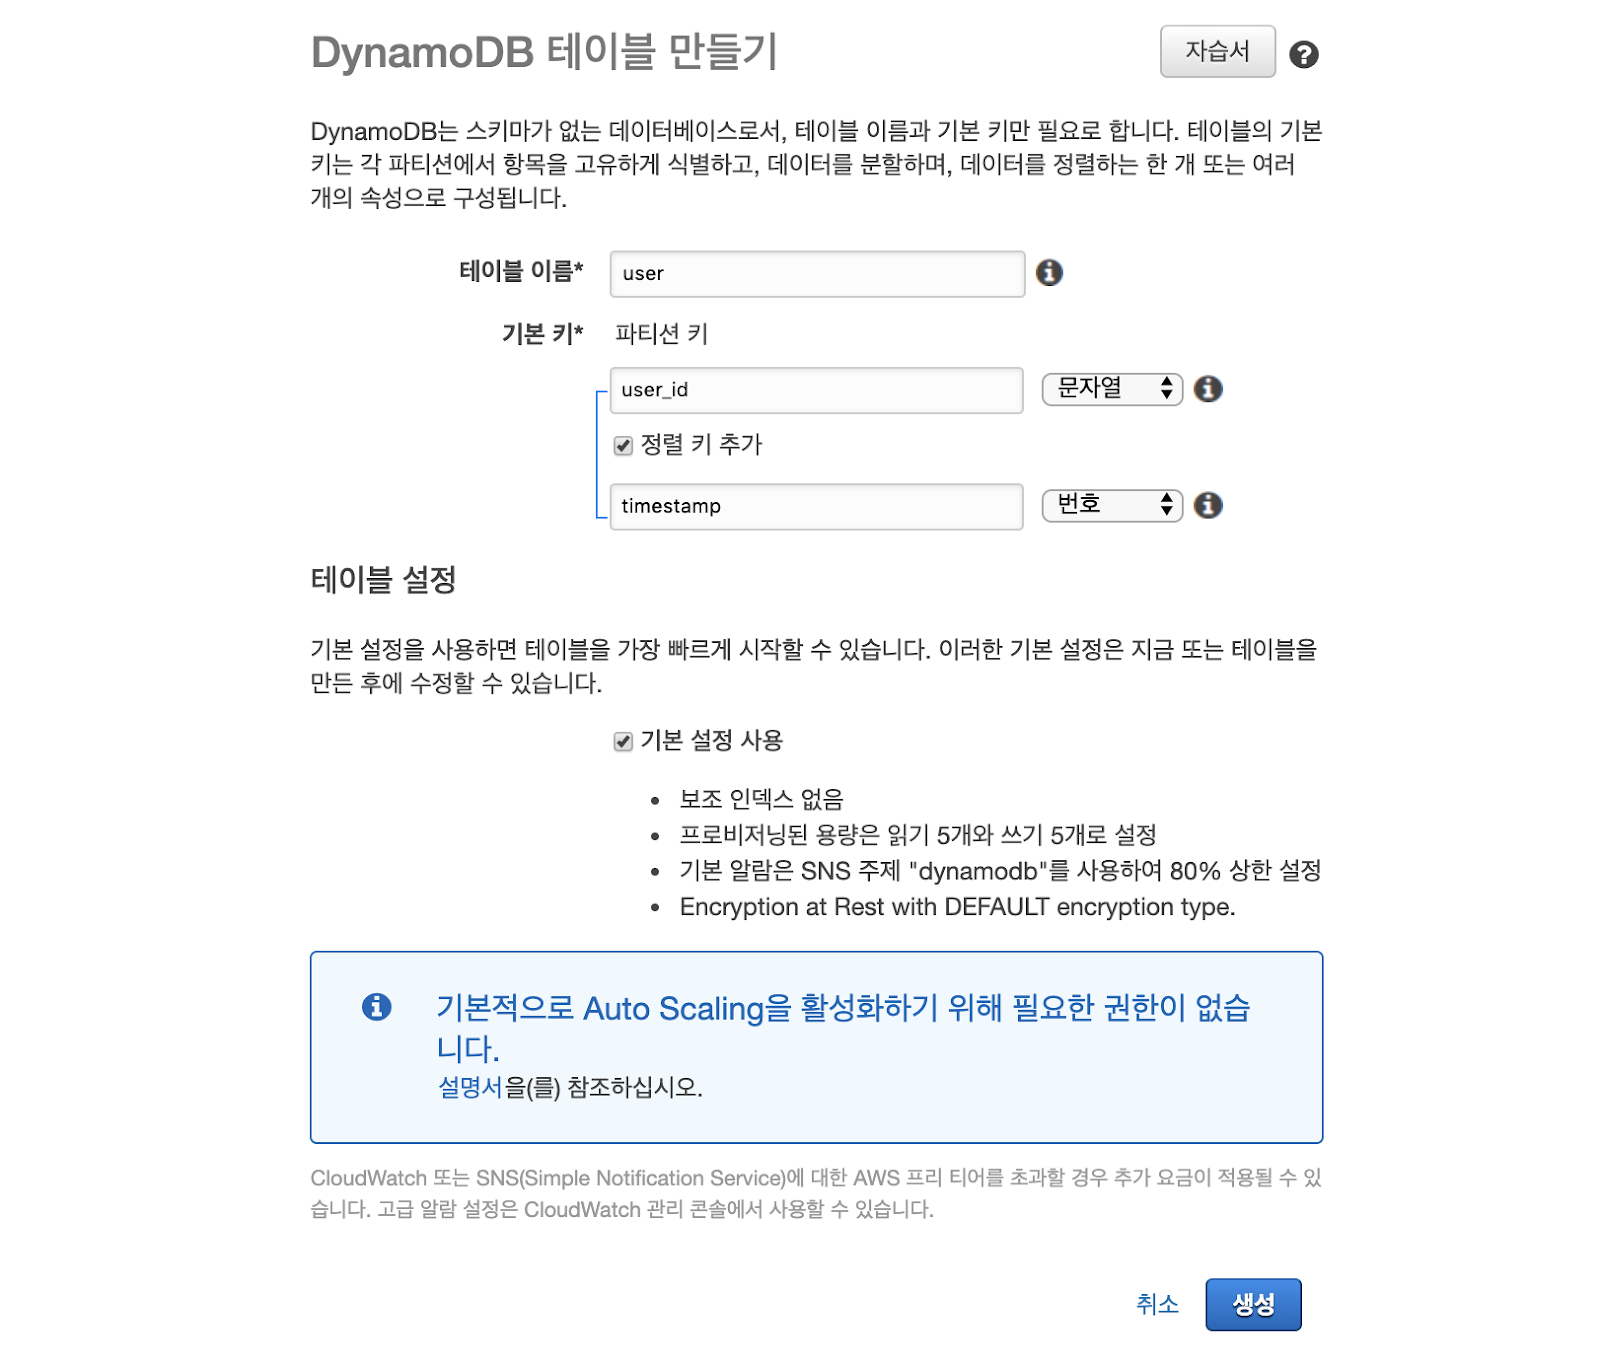
앱이나 웹을 통해 아이템은 추가될 것입니다. 여기서는 콘솔에서 직접 항목을 추가해봅시다. 항목 탭에서 항목 만들기 버튼을 클릭합니다.

user_id와 timestamp 그리고 추가로 data라는 attribute를 생성하고 value에 값을 추가한 뒤에 저장 버튼을 클릭합니다.
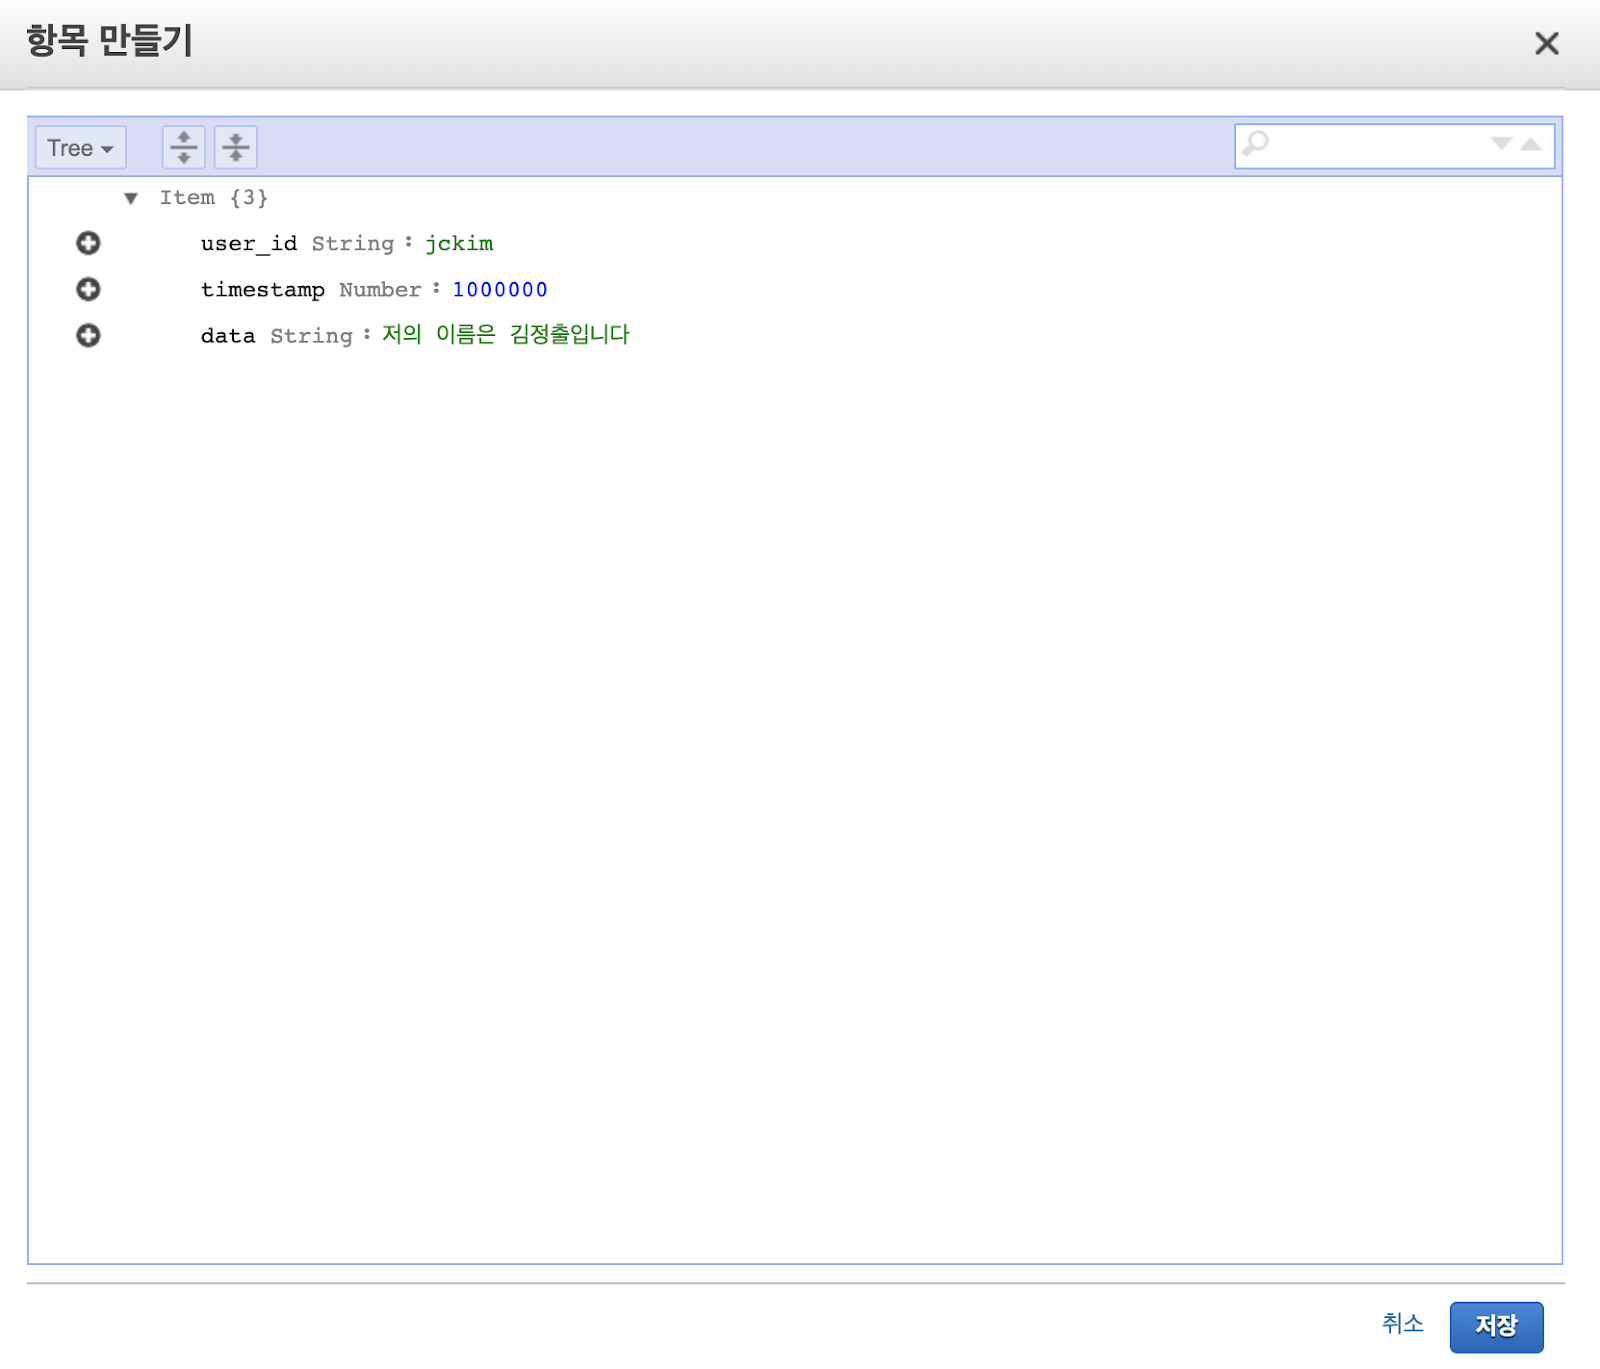
값이 추가 된 것을 확인할 수 있습니다. 자 이제 이 값을 안드로이드 앱에서 불러와서 뿌려봅시다.
AWS Mobile Hub
다음에 설정해야할 것은 AWS Mobile Hub입니다.

AWS Mobile Hub 콘솔에서 Create 버튼을 눌러 프로젝트를 추가합니다.
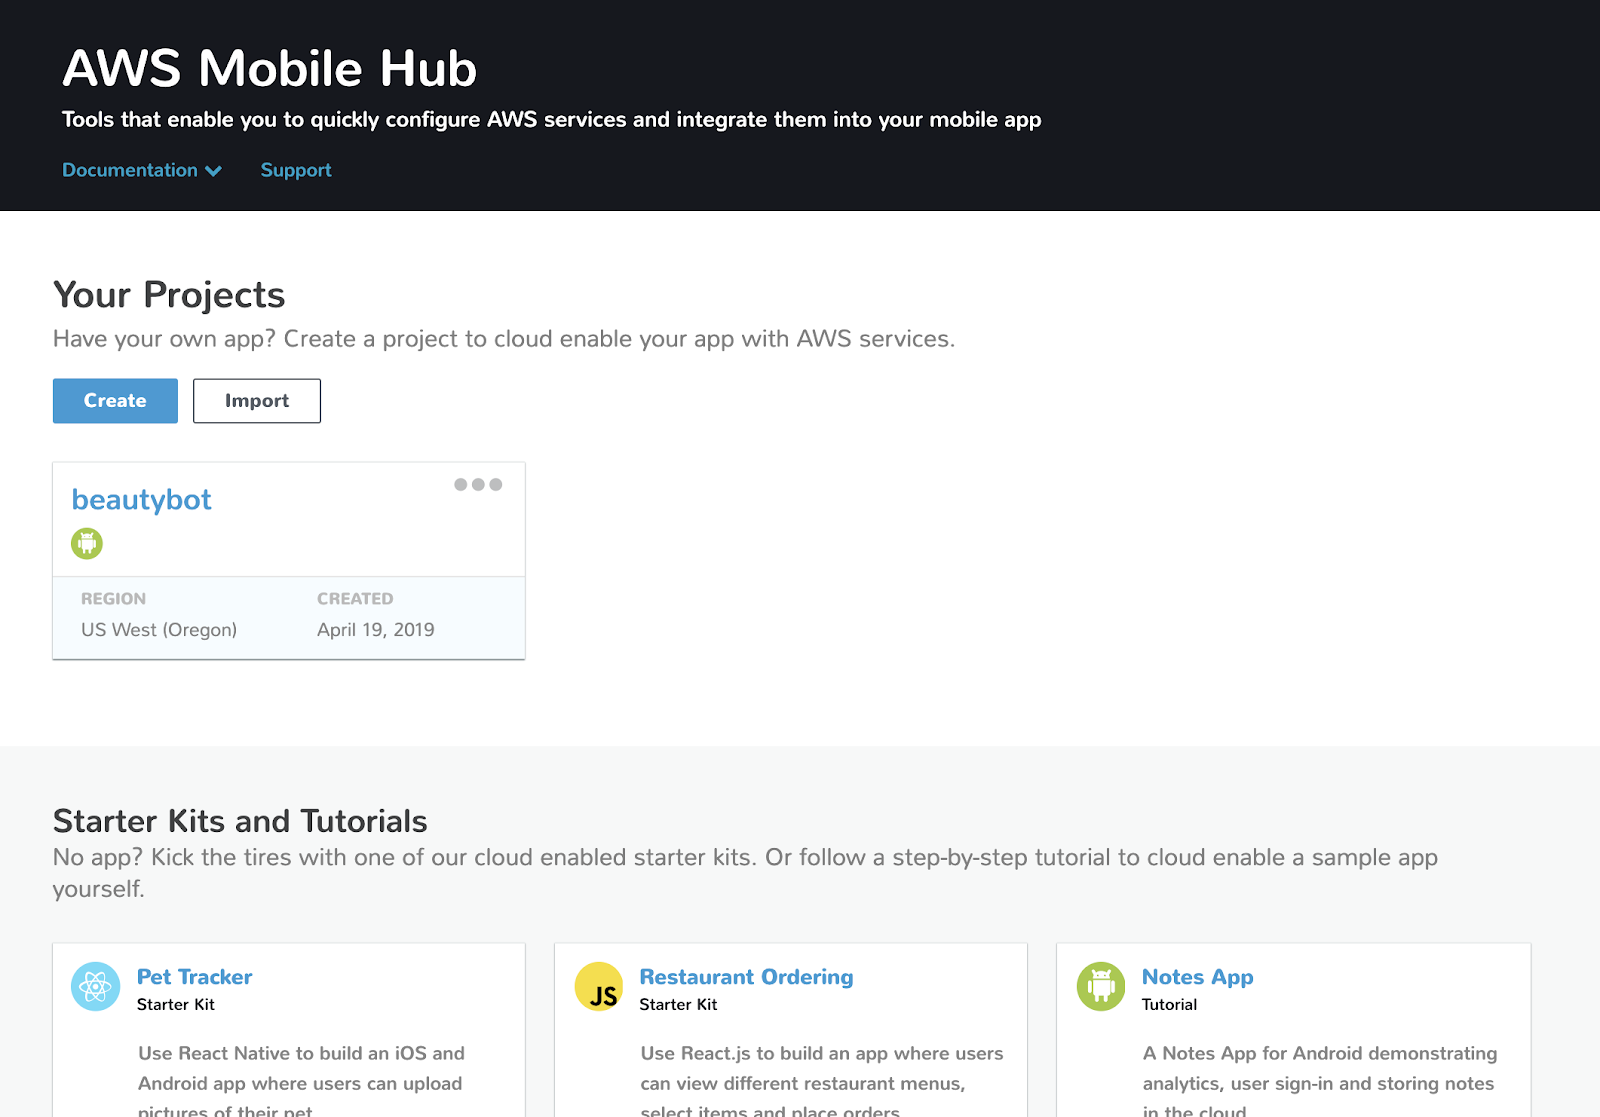
Region을 잘 살펴보시고 project의 이름을 추가합니다.

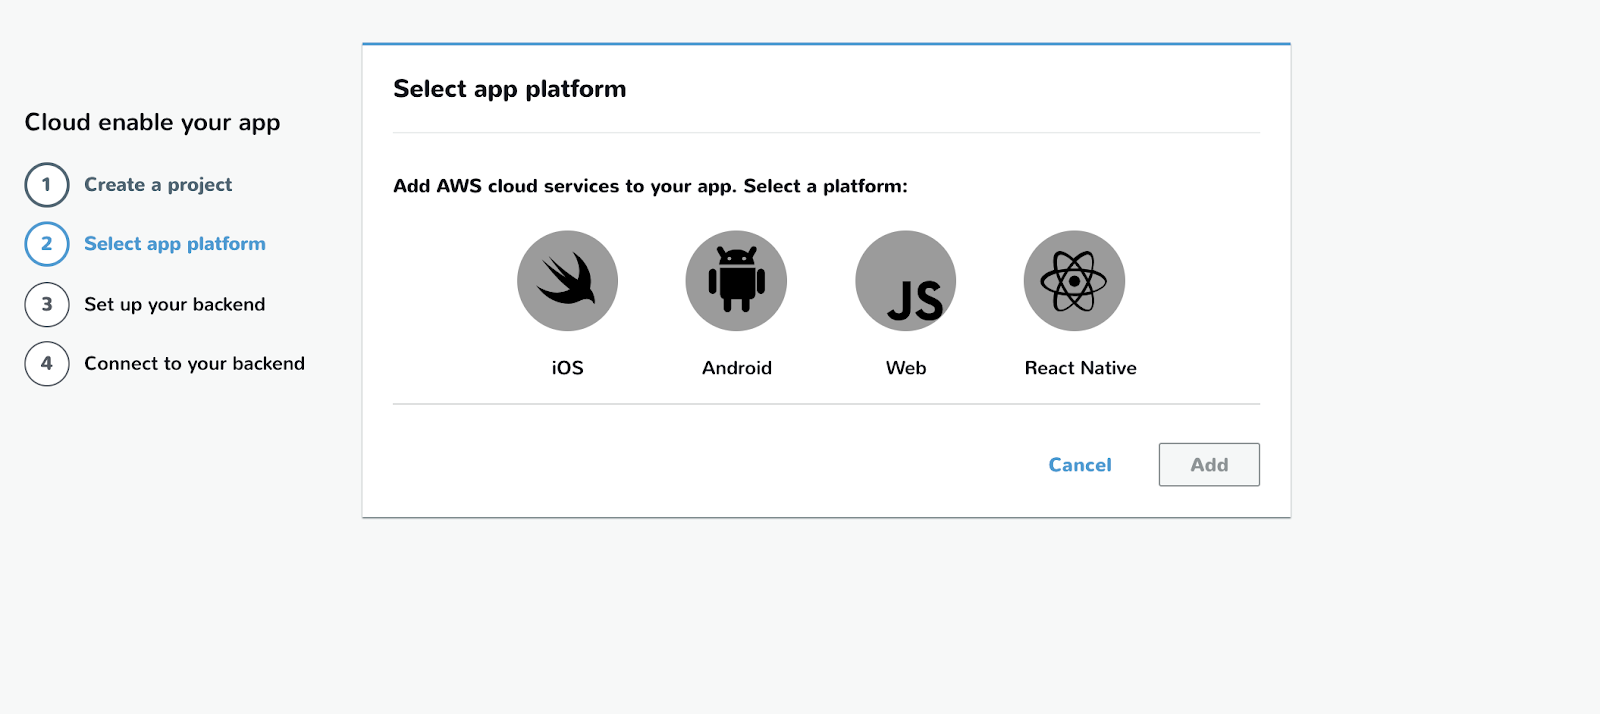
앱의 플랫폼 android을 선택하고 Add 버튼을 클릭합니다.
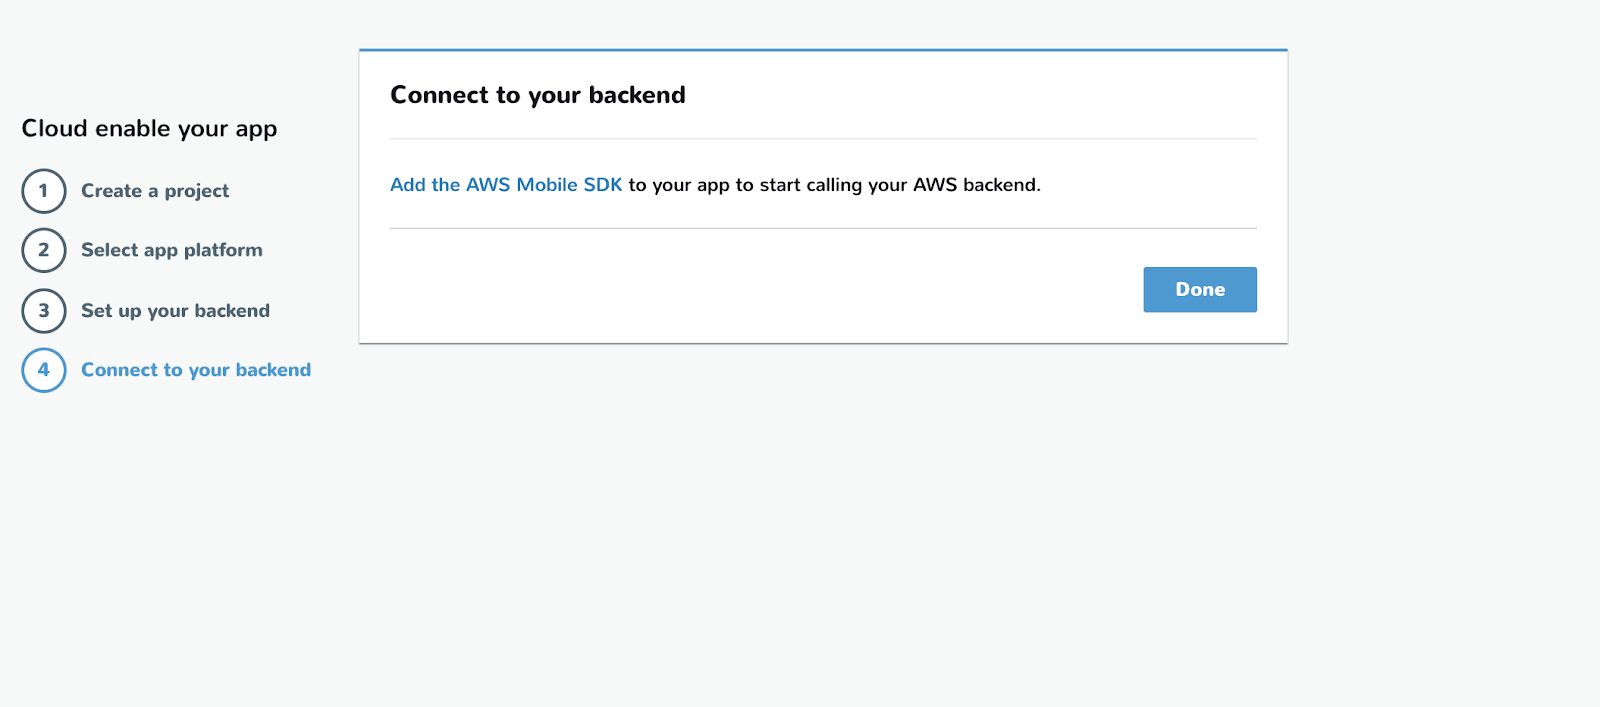
Download Cloud config 버튼을 통해서 json 파일을 다운 받고, Next 버튼을 클릭합니다.

AWS Mobile SDK를 추가해야 합니다.
AWS IAM

다음 AWS Mobile Hub에서 사용된 역할에 DynamoDB 액세스 권한을 부여합시다.
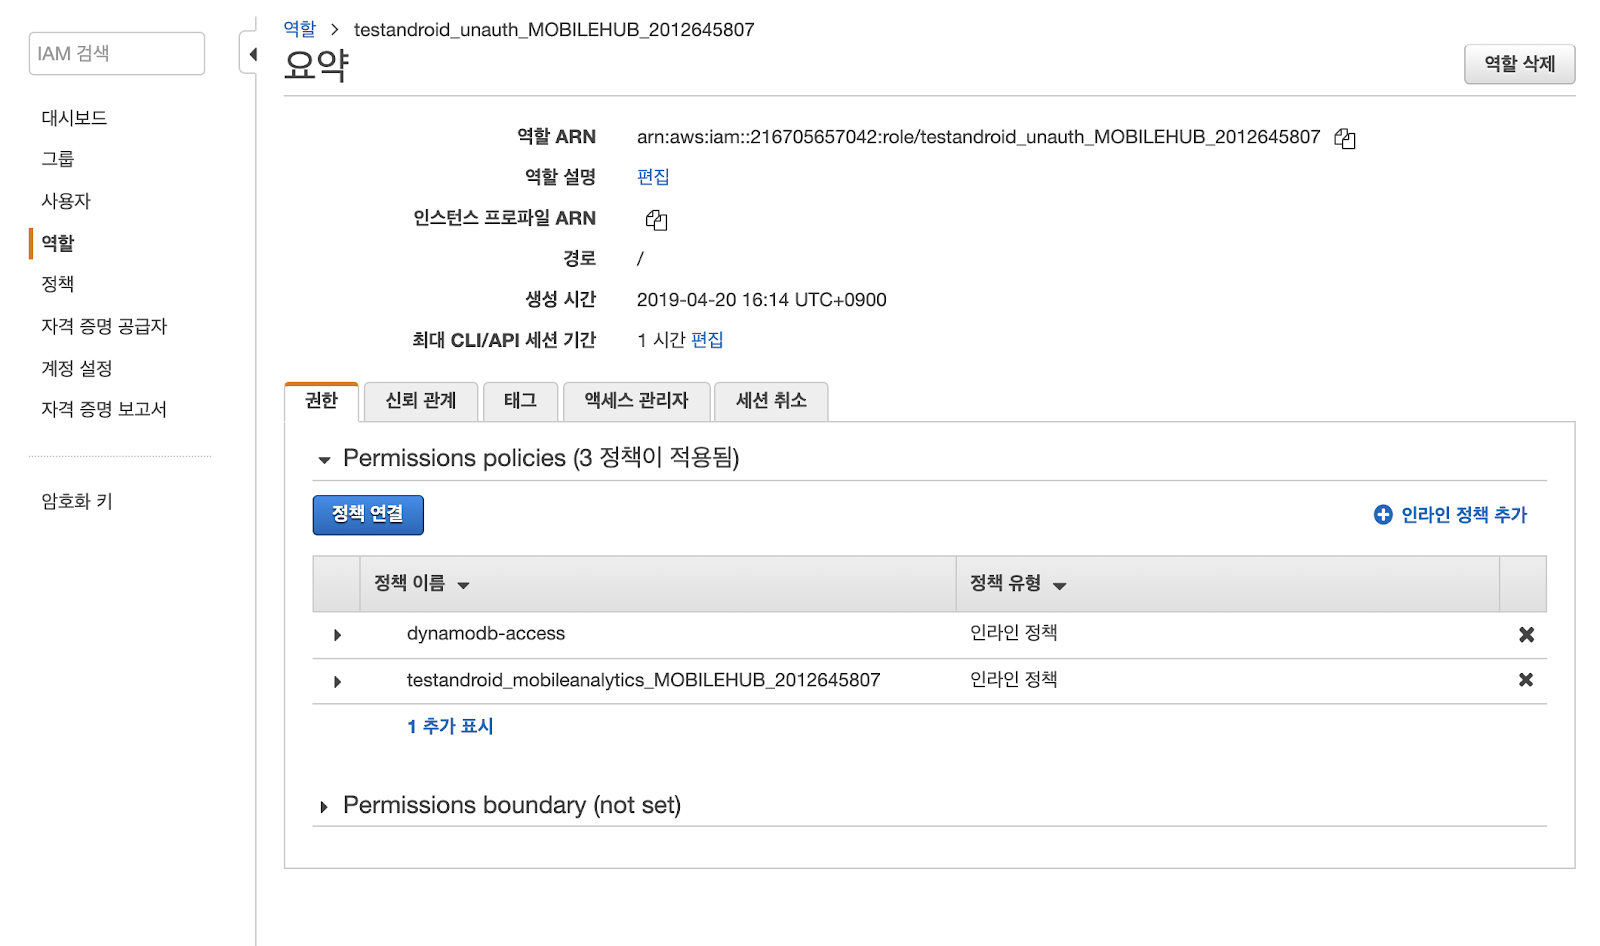
Android Mobile Hub에서 생성한 프로젝트의 이름에 unauth라고 생긴 role을 클릭합니다.

이곳에 인라인 정책을 추가합니다.

JSON 탭을 클릭하고 다음의 내용을 붙여넣기 합니다.
이 때 Resource의 ARN에서 dynamoDB의 ARN을 넣으셔야 합니다.
{
  "Statement": [{
       "Effect": "Allow",
       "Action": \[
           "dynamodb:DeleteItem",
           "dynamodb:GetItem",
           "dynamodb:PutItem",
           "dynamodb:Scan",
           "dynamodb:Query",
           "dynamodb:UpdateItem",
           "dynamodb:BatchWriteItem"
       \],

       "Resource": \[
           "arn:aws:dynamodb:us-west-2:216705657042:table/user"
       \]
    }]
}
정책 검토 버튼을 클릭합니다.

정책 이름을 넣고 정책 생성 버튼을 클릭합니다.
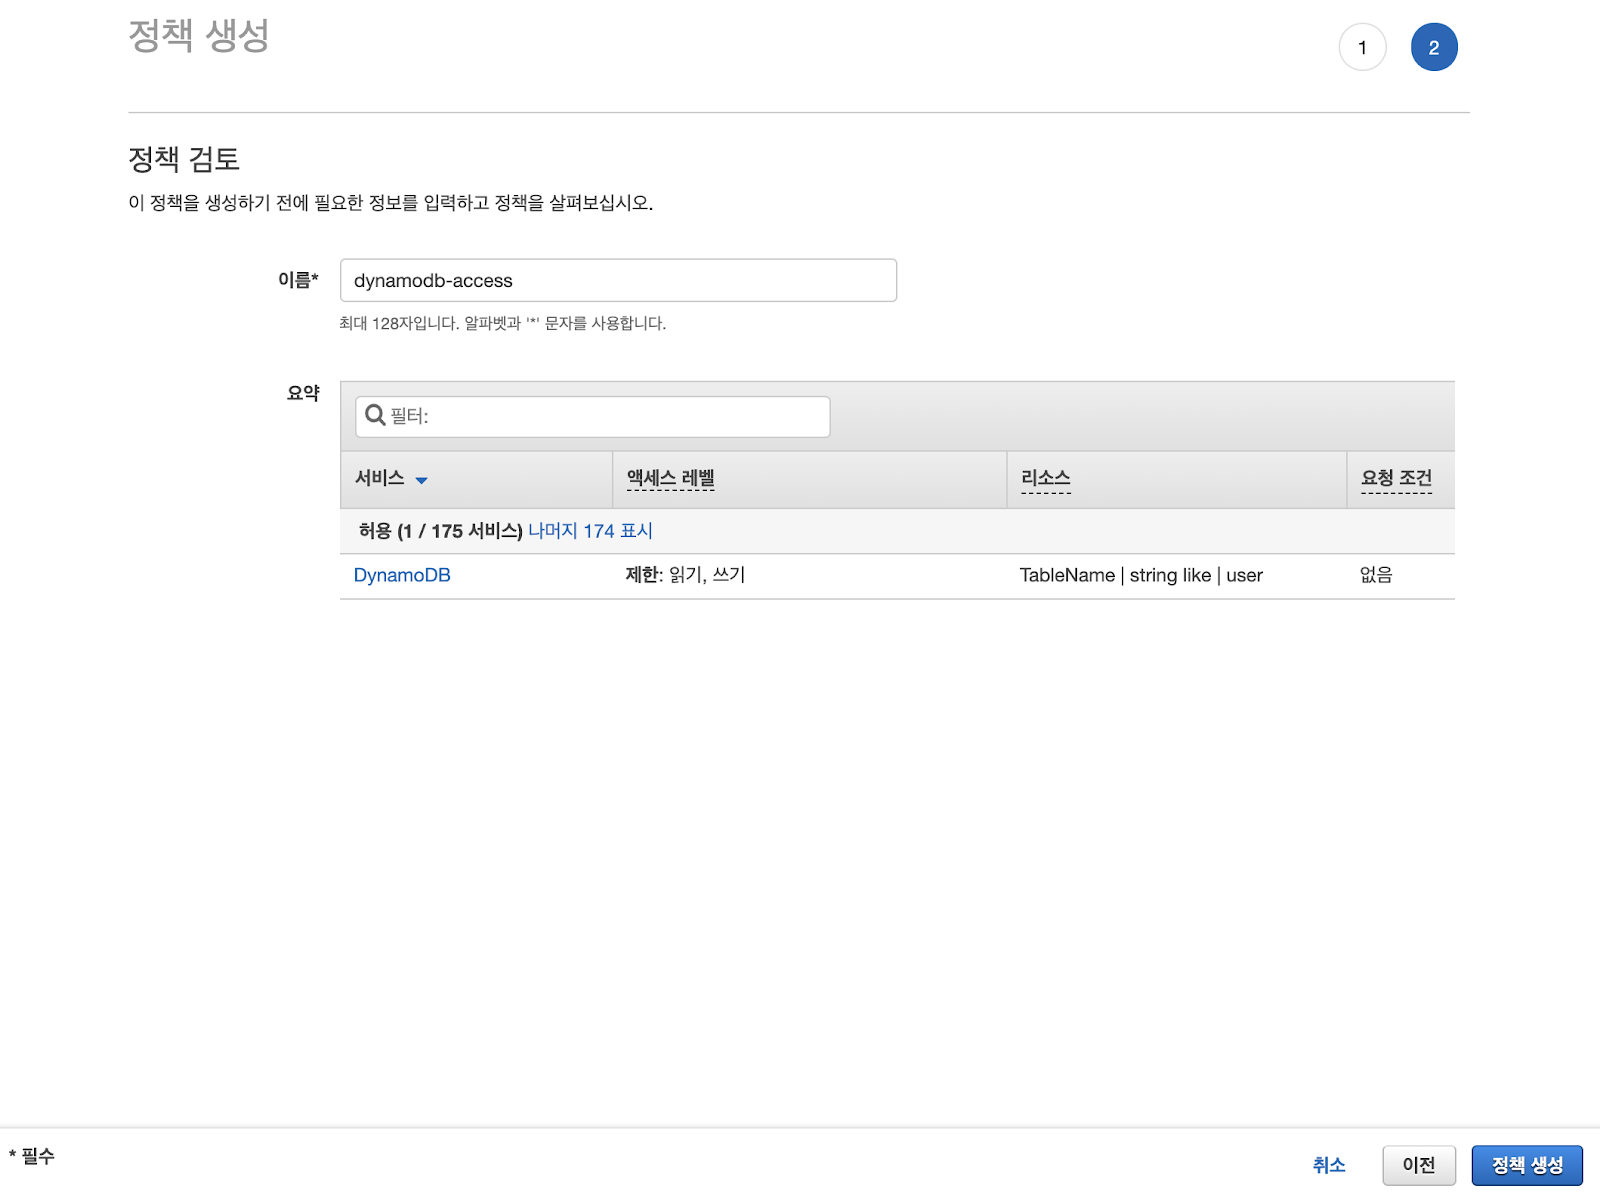
추가된 정책을 확인하고 넘어갑시다.
Android

Android의 AndroidManifest.xml에는 인터넷을 허용하는 퍼미션을 설정해줘야 합니다.
<uses-permission android:name="android.permission.INTERNET"/>
<uses-permission android:name="android.permission.ACCESS_NETWORK_STATE"/>
다음으로는 app/build.gradle에 dependencies를 추가해야 합니다.
dependencies {
    implementation ('com.amazonaws:aws-android-sdk-mobile-client:2.7.+@aar') { transitive = true }
    implementation 'com.amazonaws:aws-android-sdk-ddb-mapper:2.7.+'
}
위에서 다운받은 json 파일을 project에 넣어야 합니다. res 디렉토리에 raw라는 디렉토리를 생성하고 그 안에 아까 다운받은 awsconfiguration.json을 복사해서 붙여넣습니다.


Fragment 클래스를 구현합니다. Fragment를 호출하는 Activity도 구현을 하셔야 됩니다.
AWSFragment.class
핵심은 AWSMobileClient와 AmazonDynamoDBClient, 그리고 DynamoDBMapper를 구현해야 합니다.
여기서는 DynamoDB에서 데이터를 가져오는 동안 ProgressDialog를 이용해서 로딩을 띄웁니다.
그리고 데이터를 가져오는 부분은 Thread를 이용해서 구현하고, Layout의 TextView 컴포넌트에 데이터를 나타내고 업데이트하는 부분은 getActivity().runOnUiThread를 이용해 TextView의 setText로 데이터를 표시합니다.
package com.jckim;

import android.app.ProgressDialog;
import android.os.Bundle;
import android.support.v4.app.Fragment;
import android.util.Log;
import android.view.LayoutInflater;
import android.view.View;
import android.view.ViewGroup;
import android.widget.TextView;

import com.amazonaws.mobile.client.AWSMobileClient;
import com.amazonaws.mobile.client.AWSStartupHandler;
import com.amazonaws.mobile.client.AWSStartupResult;
import com.amazonaws.mobileconnectors.dynamodbv2.dynamodbmapper.DynamoDBMapper;
import com.amazonaws.services.dynamodbv2.AmazonDynamoDBClient;


public class AWSFragment extends Fragment {

    private DynamoDBMapper dynamoDBMapper;

    private String user = "jckim";

    private String data;

    TextView textViewUser;
    TextView textViewData;

    View view;

    ProgressDialog pDialog;

    public AWSFragment() {
        // Required empty public constructor
    }

    @Override
    public void onCreate(Bundle savedInstanceState) {
        super.onCreate(savedInstanceState);

        // ProgresBar
        pDialog = new ProgressDialog(getContext());
        pDialog.setProgressStyle(ProgressDialog.STYLE_SPINNER);
        pDialog.setMessage("로딩 중입니다");
        pDialog.show();

        // AWSMobileClient enables AWS user credentials to access your table
        AWSMobileClient.getInstance().initialize(getContext(), new AWSStartupHandler() {

            @Override
            public void onComplete(AWSStartupResult awsStartupResult) {

                // Add code to instantiate a AmazonDynamoDBClient
                AmazonDynamoDBClient dynamoDBClient = new AmazonDynamoDBClient(AWSMobileClient.getInstance().getCredentialsProvider());
                dynamoDBMapper = DynamoDBMapper.builder()
                        .dynamoDBClient(dynamoDBClient)
                        .awsConfiguration(
                                AWSMobileClient.getInstance().getConfiguration())
                        .build();

                readData();
            }
        }).execute();

    }

    public void readData() {
        new Thread(new Runnable() {
            @Override
            public void run() {
                UserDB item = dynamoDBMapper.load(UserDB.class, user, 1000000L);
                data = item.getData();
                Log.i("[*]AWS", "data : " + data);

                getActivity().runOnUiThread(new Runnable() {
                    @Override
                    public void run() {
                        textViewUser.setText(user);
                        textViewData.setText(data);
                    }
                });

                pDialog.dismiss();
            }
        }).start();
    }

    @Override
    public View onCreateView(LayoutInflater inflater, ViewGroup container,
                             Bundle savedInstanceState) {
        // Inflate the layout for this fragment
        view = inflater.inflate(R.layout.fragment_aws, container, false);

        textViewUser = view.findViewById(R.id.textViewUser);
        textViewData = view.findViewById(R.id.textViewData);

        return view;
    }
}
UserDB.class
다음으로 제일 중요한 UserDB 클래스를 구현해야 합니다.
DynamoDBHashKey는 파티션키이고, DynamoDBRangeKey는 정렬키 그리고 다른 Attribute는 DynamoDBAttribute로 정의하면 됩니다. DynamoDBTable에 테이블 이름을 잘 입력합니다.
package com.jckim;

import com.amazonaws.mobileconnectors.dynamodbv2.dynamodbmapper.DynamoDBAttribute;
import com.amazonaws.mobileconnectors.dynamodbv2.dynamodbmapper.DynamoDBHashKey;
import com.amazonaws.mobileconnectors.dynamodbv2.dynamodbmapper.DynamoDBRangeKey;
import com.amazonaws.mobileconnectors.dynamodbv2.dynamodbmapper.DynamoDBTable;

@DynamoDBTable(tableName = "user")
public class UserDB {

    private String user_id;
    private Long timestamp;
    private String data;

    @DynamoDBHashKey(attributeName = "user_id")
    @DynamoDBAttribute(attributeName = "user_id")
    public String getuserID() {
        return username;
    }

    public void setuserID(final String user_id) {
        this.user_id = user_id;
    }

    @DynamoDBRangeKey(attributeName = "timestamp")
    @DynamoDBAttribute(attributeName = "timestamp")
    public Long getTimestamp() {
        return timestamp;
    }

    public void setTimestamp(final Long timestamp) {
        this.timestamp = timestamp;
    }

    @DynamoDBAttribute(attributeName = "data")
    public String getData() {
        return data;
    }

    public void setData(final String data) {
        this.data = data;
    }
}
fragment_aws.xml
자 다음은 XML 파일입니다.
<?xml version="1.0" encoding="utf-8"?>
<android.support.constraint.ConstraintLayout xmlns:android="http://schemas.android.com/apk/res/android"
    xmlns:app="http://schemas.android.com/apk/res-auto"
    xmlns:tools="http://schemas.android.com/tools"
    android:id="@+id/AWSFragmentLayout"
    android:layout_width="match_parent"
    android:layout_height="match_parent"
    tools:context=".MainFragment">

    <LinearLayout
        android:layout_width="match_parent"
        android:layout_height="match_parent"
        android:background="@color/colorWhite"
        android:orientation="vertical">

        <TextView
            android:id="@+id/textViewUser"
            android:layout_width="match_parent"
            android:layout_height="wrap_content"
            android:layout_marginTop="24dp"
            android:gravity="center"
            android:textColor="@android:color/black"
            android:textSize="30sp" />

        <TextView
            android:id="@+id/textViewData"
            android:layout_width="match_parent"
            android:layout_height="wrap_content"
            android:layout_marginTop="24dp"
            android:gravity="center"
            android:textColor="@android:color/black"
            android:textSize="30sp" />

    </LinearLayout>

</android.support.constraint.ConstraintLayout>
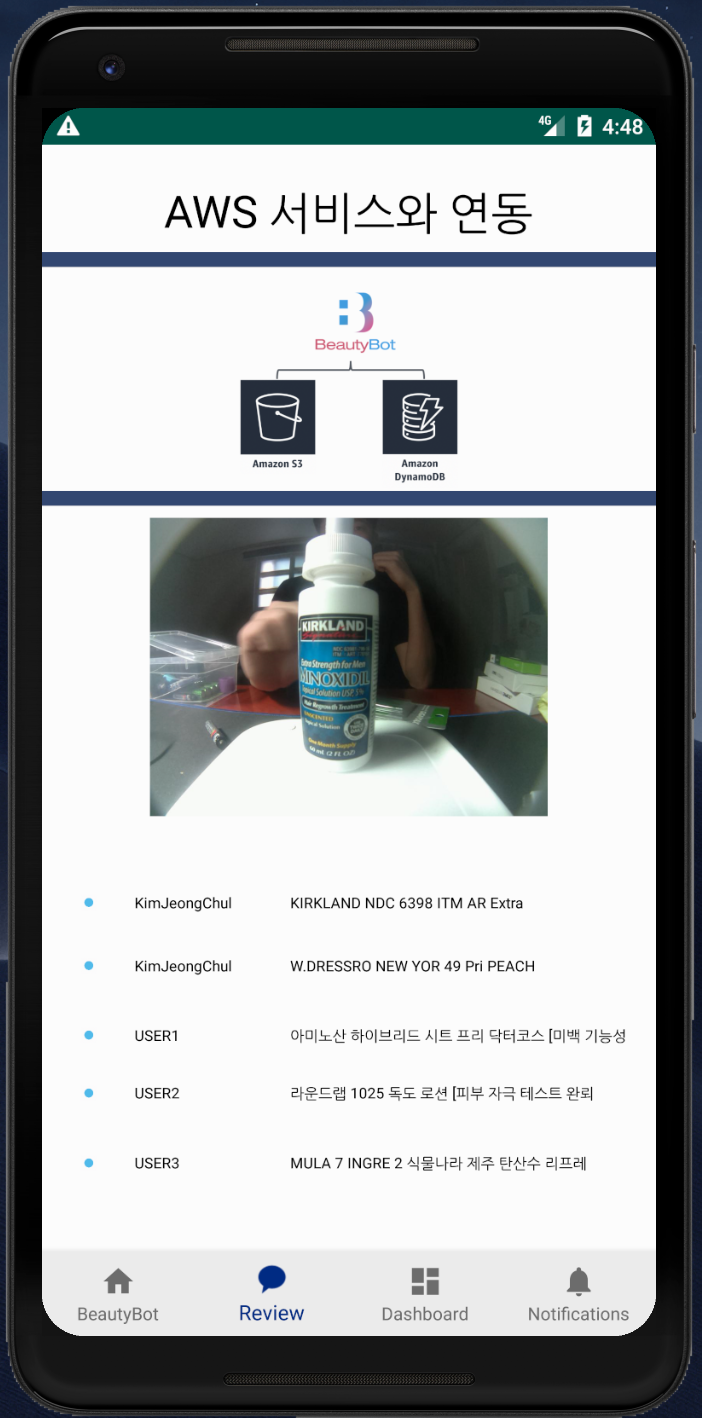
완료가 되었습니다.
실제로 실행하면 Log에서 값을 가져오는 것을 보실 수 있습니다.

'APPLICATION' 카테고리의 다른 글
| ChatGPT 추천 어플(앱) TOP 5 (0) | 2023.05.23 |
|---|---|
| React 기반의 Frontend 개발 순서를 정리합니다. (0) | 2021.06.11 |
| 반응형 웹사이트 VS 앱 개발 (1) | 2020.02.08 |
| Ionic Framework - 하이브리드앱 개발기 (0) | 2017.02.01 |
| 앱 출시를 위해 준비해야 할 이미지들 (2) | 2016.11.21 |

